JavaScript events are a fundamental concept for creating interactive and dynamic web applications. They provide the ability to respond to user actions, such as clicks, key presses, and mouse movements, making web pages responsive and engaging. Understanding how to work with JavaScript events is essential for any web developer. This comprehensive guide will introduce you to JavaScript events, covering their types, how to handle them, and practical examples to illustrate their usage.
Basic DOM Manipulation: A Comprehensive Guide
What are JavaScript Events?
In the context of web development, an javascript event is any action or occurrence that happens in the browser and can be detected by JavaScript. Events can be triggered by user interactions like clicking a button, hovering over an element, or pressing a key. They can also occur due to other actions, such as loading a page or a media file finishing playing.
Types of Events
JavaScript events can be broadly categorized into several types based on their nature and the user interaction they respond to. Some of the most common types include:
- Mouse Events: Triggered by mouse actions.
click: Occurs when an element is clicked.dblclick: Occurs when an element is double-clicked.mousedown: Occurs when the mouse button is pressed down on an element.mouseup: Occurs when the mouse button is released over an element.mouseover: Occurs when the mouse pointer is moved onto an element.mouseout: Occurs when the mouse pointer is moved out of an element.mousemove: Occurs when the mouse pointer is moving while it is over an element.
- Keyboard Events: Triggered by keyboard actions.
keydown: Occurs when a key is pressed down.keypress: Occurs when a key is pressed and released.keyup: Occurs when a key is released.
- Form Events: Triggered by form element actions.
submit: Occurs when a form is submitted.change: Occurs when the value of an input element changes.focus: Occurs when an element gets focus.blur: Occurs when an element loses focus.
- Document/Window Events: Triggered by actions on the document or window.
load: Occurs when the document has finished loading.resize: Occurs when the document view is resized.scroll: Occurs when the document view is scrolled.
- Touch Events: Triggered by touch screen interactions.
touchstart: Occurs when a finger is placed on the touch screen.touchend: Occurs when a finger is removed from the touch screen.touchmove: Occurs when a finger is moved across the touch screen.touchcancel: Occurs when a touch is interrupted.
Event Handling in JavaScript
Handling events in JavaScript involves specifying what should happen when an event occurs. This is done by writing event handlers, which are functions that are called when an event is triggered. There are several ways to add event handlers in JavaScript:
Inline Event Handlers
You can define event handlers directly in the HTML code using event attributes. This method is straightforward but can lead to code that is harder to maintain.
<button onclick="alert('Button clicked!')">Click me</button>DOM Level 0 (Traditional) Event Handlers
You can assign event handlers directly to the DOM elements’ event properties. This method is simple but has the drawback of allowing only one event handler per event type on an element.
let button = document.getElementById('myButton');
button.onclick = function() {
    alert('Button clicked!');
};
DOM Level 2 (Modern) Event Listeners
This method uses the addEventListener method to attach event handlers. It allows multiple handlers for the same event type on an element and provides more control over the event handling process.
let button = document.getElementById('myButton');
button.addEventListener('click', function() {
    alert('Button clicked!');
});
Removing Event Listeners
If you need to remove an event listener, you can use the removeEventListener method. This requires a reference to the original function used when adding the event listener.
function handleClick() {
    alert('Button clicked!');
}

button.addEventListener('click', handleClick);
// To remove the event listener
button.removeEventListener('click', handleClick);
Event Objects
When an event occurs, an event object is created and passed to the event handler. This object contains information about the event, such as the type of event, the target element, and additional properties related to the specific event type.
Common Properties and Methods of the Event Object
type: The type of the event (e.g., ‘click’, ‘keydown’).target: The element that triggered the event.currentTarget: The element to which the event handler is attached.preventDefault(): Prevents the default action associated with the event (e.g., following a link).stopPropagation(): Stops the event from bubbling up the DOM tree.
Example of Using the Event Object
let button = document.getElementById('myButton');
button.addEventListener('click', function(event) {
    alert('Button clicked! Event type: ' + event.type);
});
Event Propagation
Event propagation is the process by which events flow through the DOM tree. There are three phases in event propagation:
- Capturing Phase: The event starts from the root and travels down to the target element.
- Target Phase: The event reaches the target element.
- Bubbling Phase: The event bubbles up from the target element to the root.
By default, most events bubble, meaning they start at the target element and propagate up to the root. However, you can control the propagation using event listeners.
Capturing vs. Bubbling
You can specify whether an event listener should be invoked during the capturing phase or the bubbling phase by passing a third parameter to addEventListener. If true, the listener will be invoked during the capturing phase; if false, during the bubbling phase (default).
let parent = document.getElementById('parent');
let child = document.getElementById('child');

parent.addEventListener('click', function() {
    alert('Parent clicked!');
}, true); // Capturing phase

child.addEventListener('click', function() {
    alert('Child clicked!');
}); // Bubbling phase (default)
Stopping Event Propagation
You can stop the event propagation using the stopPropagation method.
child.addEventListener('click', function(event) {
    alert('Child clicked!');
    event.stopPropagation();
});
Practical Examples of JavaScript Events
Example 1: Form Validation
Let’s create a simple form validation example that checks if the input fields are filled before submitting the form.
HTML
<!DOCTYPE html>
<html lang="en">
<head>
    <meta charset="UTF-8">
    <meta name="viewport" content="width=device-width, initial-scale=1.0">
    <title>Form Validation</title>
</head>
<body>
    <form id="myForm">
        <label for="name">Name:</label>
        <input type="text" id="name" name="name"><br><br>
        <label for="email">Email:</label>
        <input type="email" id="email" name="email"><br><br>
        <input type="submit" value="Submit">
    </form>

    <script src="script.js"></script>
</body>
</html>
JavaScript
document.getElementById('myForm').addEventListener('submit', function(event) {
let name = document.getElementById('name').value;
let email = document.getElementById('email').value;
if (name === '' || email === '') {
alert('Please fill in all fields');
event.preventDefault(); // Prevent form submission
}
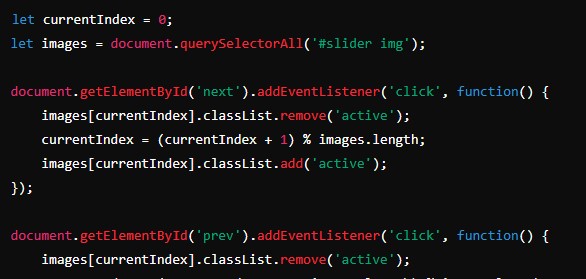
});Example 2: Image Slider
Let’s create a simple image slider that changes images when the user clicks the “Next” and “Previous” buttons.
HTML
<!DOCTYPE html>
<html lang="en">
<head>
    <meta charset="UTF-8">
    <meta name="viewport" content="width=device-width, initial-scale=1.0">
    <title>Image Slider</title>
    <style>
        #slider img {
            display: none;
        }
        #slider img.active {
            display: block;
        }
    </style>
</head>
<body>
    <div id="slider">
        <img src="image1.jpg" class="active" alt="Image 1">
        <img src="image2.jpg" alt="Image 2">
        <img src="image3.jpg" alt="Image 3">
    </div>
    <button id="prev">Previous</button>
    <button id="next">Next</button>

    <script src="script.js"></script>
</body>
</html>
JavaScript
let currentIndex = 0;
let images = document.querySelectorAll('#slider img');

document.getElementById('next').addEventListener('click', function() {
    images[currentIndex].classList.remove('active');
    currentIndex = (currentIndex + 1) % images.length;
    images[currentIndex].classList.add('active');
});

document.get

ElementById('prev').addEventListener('click', function() {
    images[currentIndex].classList.remove('active');
    currentIndex = (currentIndex - 1 + images.length) % images.length;
    images[currentIndex].classList.add('active');
});
Example 3: Dropdown Menu
Let’s create a dropdown menu that shows and hides its content when clicked.
HTML
<!DOCTYPE html>
<html lang="en">
<head>
    <meta charset="UTF-8">
    <meta name="viewport" content="width=device-width, initial-scale=1.0">
    <title>Dropdown Menu</title>
    <style>
        #dropdownContent {
            display: none;
        }
    </style>
</head>
<body>
    <div id="dropdown">
        <button id="dropdownButton">Menu</button>
        <div id="dropdownContent">
            <p>Option 1</p>
            <p>Option 2</p>
            <p>Option 3</p>
        </div>
    </div>

    <script src="script.js"></script>
</body>
</html>
JavaScript
document.getElementById('dropdownButton').addEventListener('click', function() {
    let content = document.getElementById('dropdownContent');
    if (content.style.display === 'none' || content.style.display === '') {
        content.style.display = 'block';
    } else {
        content.style.display = 'none';
    }
});
Conclusion
JavaScript events are a powerful feature that enables developers to create dynamic, interactive web applications. By understanding the types of events, how to handle them, and the concept of event propagation, you can build more responsive and user-friendly interfaces. The practical examples provided in this article demonstrate how to apply these concepts to real-world scenarios, helping you to become more proficient in JavaScript event handling. As you continue to explore and practice, you’ll discover even more ways to leverage events to enhance your web applications.