Developing a Computer Vision Application with OpenCV in C++
Computer Vision, the field of enabling machines to interpret and make decisions based on visual data, has seen tremendous growth in recent years. One of the key technologies driving this progress is OpenCV (Open-Source Computer Vision Library), an open-source computer vision and machine learning software library. In this blog post, we’ll explore the process of developing a Computer Vision application using OpenCV in C++.
Understanding OpenCV
OpenCV is a powerful library that provides a wide range of tools and algorithms for computer vision applications. It supports real-time image and video analysis, allowing developers to build applications for various domains, including robotics, healthcare, augmented reality, and more.
Getting Started
Before diving into the application development, make sure you have OpenCV installed on your system. You can download the library from the official OpenCV website or use package managers like apt on Ubuntu or brew on macOS.
Once installed, include the necessary headers in your C++ code:
#include <opencv2/opencv.hpp>Loading an Image
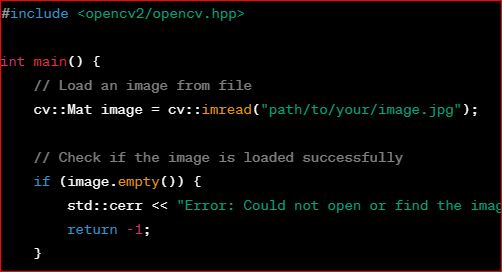
Let’s start by loading an image using OpenCV:
#include <opencv2/opencv.hpp>

int main() {
    // Load an image from file
    cv::Mat image = cv::imread("path/to/your/image.jpg");

    // Check if the image is loaded successfully
    if (image.empty()) {
        std::cerr << "Error: Could not open or find the image." << std::endl;
        return -1;
    }

    // Display the loaded image
    cv::imshow("Original Image", image);
    cv::waitKey(0);

    return 0;
}
This simple program loads an image, checks for errors, and displays the image using OpenCV’s imshow function.
Image Processing
OpenCV provides a plethora of functions for image processing. Let’s explore a basic example of converting a color image to grayscale:
#include <opencv2/opencv.hpp>

int main() {
    // Load an image from file
    cv::Mat image = cv::imread("path/to/your/image.jpg");

    // Check if the image is loaded successfully
    if (image.empty()) {
        std::cerr << "Error: Could not open or find the image." << std::endl;
        return -1;
    }

    // Convert the image to grayscale
    cv::Mat grayImage;
    cv::cvtColor(image, grayImage, cv::COLOR_BGR2GRAY);

    // Display the grayscale image
    cv::imshow("Grayscale Image", grayImage);
    cv::waitKey(0);

    return 0;
}
Adding Computer Vision Algorithms
OpenCV includes a variety of pre-built algorithms for tasks such as edge detection, object recognition, and feature extraction. Let’s incorporate edge detection into our application:
#include <opencv2/opencv.hpp>

int main() {
    // Load an image from file
    cv::Mat image = cv::imread("path/to/your/image.jpg");

    // Check if the image is loaded successfully
    if (image.empty()) {
        std::cerr << "Error: Could not open or find the image." << std::endl;
        return -1;
    }

    // Convert the image to grayscale
    cv::Mat grayImage;
    cv::cvtColor(image, grayImage, cv::COLOR_BGR2GRAY);

    // Apply edge detection
    cv::Mat edges;
    cv::Canny(grayImage, edges, 50, 150);

    // Display the edge-detected image
    cv::imshow("Edge Detection", edges);
    cv::waitKey(0);

    return 0;
}
Conclusion
This blog post provides a basic introduction to developing a Computer Vision application using OpenCV in C++. The examples covered loading an image, converting it to grayscale, and applying edge detection. OpenCV’s extensive documentation and community support make it a valuable tool for developers venturing into the field of Computer Vision.
As you continue exploring OpenCV, you’ll discover a wealth of functionalities to enhance and customize your applications. Whether you’re working on image processing, object detection, or machine learning tasks, OpenCV in C++ opens up a world of possibilities for creating intelligent and visually aware applications.