Step-by-Step Guide to Creating REST API with Django REST Framework
Introduction:
In the world of web development, creating robust and efficient APIs is crucial for building scalable and maintainable applications. Django REST Framework (DRF) is a powerful toolkit for building Web APIs in Django applications. In this step-by-step guide, we’ll walk through the process of creating a REST API using Django REST Framework.
Prerequisites:
Before diving into the tutorial, make sure you have the following prerequisites installed:
- Python and Django: Ensure that you have Python installed on your machine. You can install Django using the following command:
pip install django- Django REST Framework: Install Django REST Framework using the following command:
pip install djangorestframeworkStep 1: Create a Django Project and App:
Start by creating a new Django project and app. Open a terminal and run the following commands:
django-admin startproject yourproject
cd yourproject
python manage.py startapp yourapp
Step 2: Configure Django Settings:
Add your newly created app and ‘rest_framework’ to the INSTALLED_APPS in your project’s settings.py file:
# settings.py

INSTALLED_APPS = [
    # ...
    'rest_framework',
    'yourapp',
]
Step 3: Define Models:
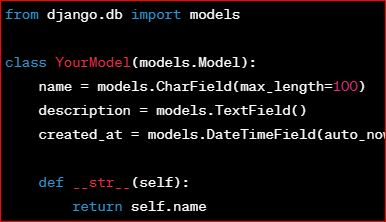
Create the models for your application in the models.py file of your app. For example:
# models.py

from django.db import models

class YourModel(models.Model):
    name = models.CharField(max_length=100)
    description = models.TextField()
    created_at = models.DateTimeField(auto_now_add=True)

    def __str__(self):
        return self.name
Don’t forget to run migrations:
python manage.py makemigrations
python manage.py migrate
Step 4: Create Serializers:
Serializers in DRF convert complex data types, such as Django querysets, into Python data types that can be easily rendered into JSON. Create a serializers.py file in your app:
# serializers.py

from rest_framework import serializers
from .models import YourModel

class YourModelSerializer(serializers.ModelSerializer):
    class Meta:
        model = YourModel
        fields = '__all__'
Step 5: Create Views:
Define views to handle the API requests. Create a views.py file in your app:
# views.py

from rest_framework import generics
from .models import YourModel
from .serializers import YourModelSerializer

class YourModelListCreateView(generics.ListCreateAPIView):
    queryset = YourModel.objects.all()
    serializer_class = YourModelSerializer
Step 6: Configure URLs:
Set up the URLs to route requests to your views. Create a urls.py file in your app:
# urls.py

from django.urls import path
from .views import YourModelListCreateView

urlpatterns = [
    path('yourmodels/', YourModelListCreateView.as_view(), name='yourmodel-list-create'),
]
Include these URLs in your project’s urls.py:
# yourproject/urls.py

from django.contrib import admin
from django.urls import path, include

urlpatterns = [
    path('admin/', admin.site.urls),
    path('api/', include('yourapp.urls')),
]
Step 7: Run Your Development Server:
Finally, run your development server:
python manage.py runserverVisit http://127.0.0.1:8000/api/yourmodels/ in your browser or a tool like Postman to interact with your newly created REST API.
Conclusion:
Congratulations! You’ve successfully created a REST API using Django REST Framework. This is just the beginning, and you can further customize your API by adding authentication, permissions, and more features provided by DRF. Happy coding!