Creating a Networked Multiplayer Game in Ruby
Introduction
The allure of creating multiplayer games lies in the challenge of designing systems that facilitate real-time interaction between players. Developing a networked multiplayer game in Ruby offers a unique opportunity to explore the intricacies of network programming, game development, and server-client architecture. This article will guide you through the process of building a simple networked multiplayer game using Ruby, covering everything from setting up the development environment to implementing real-time communication between clients and the server.
Developing a Machine Learning Model with Ruby
Why Ruby for Game Development?
Ruby is celebrated for its elegant syntax and ease of use, making it an excellent choice for rapid development and prototyping. While it may not be as fast as languages like C++ for high-performance gaming, Ruby’s readability and simplicity allow developers to focus onnetworked multiplayer game logic and network communication without getting bogged down by complex syntax.
Setting Up the Environment
Before we dive into coding, we need to set up our development environment. Ensure that Ruby is installed on your system. You can check your Ruby version and install it if necessary using RVM (Ruby Version Manager) or directly from the official Ruby website.
$ ruby -v
ruby 2.7.2p137 (2020-10-01 revision 5445e04352) [x86_64-darwin20]
If Ruby is not installed, you can install it using RVM with the following commands:
$ \curl -sSL https://get.rvm.io | bash -s stable
$ rvm install ruby
$ rvm use ruby --default
$ ruby -v
Creating the Project Structure
Let’s start by creating a directory for our project and setting up the basic structure:
$ mkdir networked_multiplayer_game
$ cd networked_multiplayer_game
$ mkdir lib server client
$ touch server/server.rb client/client.rb lib/game.rb
Designing the Game
For this tutorial, we will create a simple networked multiplayer game where players can move around a shared grid. The server will manage the game state and communicate updates to all connected clients.
Implementing the Server
The server will handle incoming connections from clients, manage the game state, and broadcast updates to all clients. We’ll use Ruby’s built-in Socket library to handle network communication.
Step 1: Setting Up the Server
First, we need to create a server that listens for incoming connections.
# server/server.rb
require 'socket'

server = TCPServer.new('localhost', 3000)
puts "Server started on localhost:3000"

clients = []

loop do
  client = server.accept
  clients << client
  puts "Client connected: #{client}"

  Thread.new do
    loop do
      begin
        message = client.gets.chomp
        puts "Received: #{message}"

        clients.each do |c|
          c.puts(message) unless c == client
        end
      rescue StandardError => e
        puts "Error: #{e.message}"
        clients.delete(client)
        client.close
        break
      end
    end
  end
end
Step 2: Managing the Game State
We need to create a game state that tracks the positions of all players. We’ll define a simple Game class to handle this.
# lib/game.rb
class Game
  attr_accessor :players

  def initialize
    @players = {}
  end

  def add_player(id)
    @players[id] = { x: 0, y: 0 }
  end

  def move_player(id, direction)
    case direction
    when 'up'
      @players[id][:y] -= 1
    when 'down'
      @players[id][:y] += 1
    when 'left'
      @players[id][:x] -= 1
    when 'right'
      @players[id][:x] += 1
    end
  end

  def to_s
    @players.map { |id, pos| "#{id}: (#{pos[:x]}, #{pos[:y]})" }.join("\n")
  end
end
Step 3: Integrating the Game State with the Server
Now, let’s integrate the Game class with our server to manage player movements.
# server/server.rb
require 'socket'
require_relative '../lib/game'

server = TCPServer.new('localhost', 3000)
puts "Server started on localhost:3000"

clients = []
game = Game.new

loop do
  client = server.accept
  clients << client
  player_id = client.object_id
  game.add_player(player_id)
  puts "Client connected: #{client}"

  Thread.new do
    loop do
      begin
        message = client.gets.chomp
        puts "Received: #{message}"

        if message.start_with?("move")
          direction = message.split.last
          game.move_player(player_id, direction)
        end

        clients.each do |c|
          c.puts(game.to_s) unless c == client
        end
      rescue StandardError => e
        puts "Error: #{e.message}"
        clients.delete(client)
        client.close
        break
      end
    end
  end
end
Implementing the Client
The client will connect to the server, send movement commands, and display the game state. We’ll use Ruby’s Socket library for network communication and a simple terminal interface for user input.
Step 1: Setting Up the Client
First, we need to create a client that connects to the server.
# client/client.rb
require 'socket'

server = TCPSocket.new('localhost', 3000)
puts "Connected to server"

Thread.new do
  loop do
    message = server.gets.chomp
    puts message
  end
end

loop do
  input = gets.chomp
  server.puts(input)
end
Step 2: Handling User Input
We’ll enhance the client to handle user input for moving the player.
# client/client.rb
require 'socket'

server = TCPSocket.new('localhost', 3000)
puts "Connected to server"

Thread.new do
  loop do
    message = server.gets.chomp
    puts message
  end
end

def print_instructions
  puts "Enter a direction to move (up, down, left, right):"
end

loop do
  print_instructions
  input = gets.chomp
  if %w[up down left right].include?(input)
    server.puts("move #{input}")
  else
    puts "Invalid input. Please enter a valid direction."
  end
end
Adding Features and Enhancements
Our basic networked multiplayer game is now functional, but there are many enhancements and additional features we can add:
- Player Identification: Assign unique usernames or IDs to players and display them in the game state.
- Collision Detection: Implement collision detection to prevent players from moving into the same position.
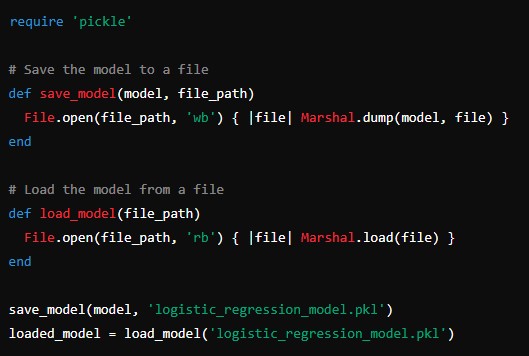
- Persistent Game State: Save and load the game state from a file to preserve progress between sessions.
- Graphical Interface: Develop a graphical user interface (GUI) using libraries like Gosu or Ruby2D to make the game more visually appealing.
- Chat Functionality: Add a chat feature to allow players to communicate with each other in real-time.
Player Identification
We can modify the server and client to include unique player names.
# server/server.rb
require 'socket'
require_relative '../lib/game'

server = TCPServer.new('localhost', 3000)
puts "Server started on localhost:3000"

clients = {}
game = Game.new

loop do
  client = server.accept
  client.puts "Enter your name:"
  name = client.gets.chomp
  clients[client] = name
  game.add_player(name)
  puts "Client connected: #{name}"

  Thread.new do
    loop do
      begin
        message = client.gets.chomp
        puts "Received: #{message}"

        if message.start_with?("move")
          direction = message.split.last
          game.move_player(name, direction)
        end

        clients.each_key do |c|
          c.puts(game.to_s) unless c == client
        end
      rescue StandardError => e
        puts "Error: #{e.message}"
        clients.delete(client)
        game.players.delete(name)
        client.close
        break
      end
    end
  end
end
# client/client.rb
require 'socket'
server = TCPSocket.new('localhost', 3000)
puts "Connected to server"
Thread.new do
loop do
message = server.gets.chomp
puts message
end
end
puts "Enter your name:"
name = gets.chomp
server.puts(name)
def print_instructions
puts "Enter a direction to move (up, down, left, right):"
end
loop do
print_instructions
input = gets.chomp
if %w[up down left right].include?(input)
server.puts("move #{input}")
else
puts "Invalid input. Please enter a valid direction."
end
endGraphical Interface with Ruby2D
To enhance the user experience, we can develop a graphical interface using Ruby2D. Install the Ruby2D gem first:
$ gem install ruby2dNow, let’s create a basic graphical client.
# client/client.rb
require 'socket'
require 'ruby2d'

server = TCPSocket.new('localhost', 3000)
puts "

Connected to server"

set title: "Multiplayer Game", width: 640, height: 480

players = {}

update do
  clear
  players.each do |name, pos|
    Square.new(x: pos[:x] * 20, y: pos[:y] * 20, size: 20, color: 'blue')
    Text.new(name, x: pos[:x] * 20, y: pos[:y] * 20 - 20, size: 10, color: 'white')
  end
end

Thread.new do
  loop do
    message = server.gets.chomp
    players = eval(message)
  end
end

on :key_down do |event|
  case event.key
  when 'up', 'down', 'left', 'right'
    server.puts("move #{event.key}")
  end
end

show
Conclusion
Creating a networked multiplayer game in Ruby is a fulfilling project that combines game development with network programming. By leveraging Ruby’s simplicity and elegance, we can focus on the core aspects of game logic and real-time communication. This article provided a comprehensive guide to building a basic networked multiplayer game, from setting up the environment to implementing a graphical interface.