Building a Chess Game in Ruby
Introduction
Chess is a classic strategy game that has captivated minds for centuries. Building a chess game in Ruby can be a challenging yet rewarding project that will improve your programming skills, deepen your understanding of object-oriented design, and provide you with a playable game at the end. In this article, we’ll walk through the process of creating a basic chess game in Ruby, covering everything from setting up the board and pieces to implementing the rules of the game and handling user input.
Matrix Multiplication Program in Ruby
Why Ruby?
Ruby is known for its elegant syntax and readability, making it a great choice for developing a complex project like a chess game. Its powerful object-oriented features and flexibility allow us to model the game in a natural and intuitive way.
Setting Up the Environment
Ensure that you have Ruby installed on your system. You can download Ruby from the official website or use a version manager like RVM (Ruby Version Manager) to install and manage different versions of Ruby.
$ ruby -v
ruby 2.7.2p137 (2020-10-01 revision 5445e04352) [x86_64-darwin20]
If Ruby is not installed, you can install it using RVM with the following commands:
$ \curl -sSL https://get.rvm.io | bash -s stable
$ rvm install ruby
$ rvm use ruby --default
$ ruby -v
Creating the Project Structure
Let’s start by creating a directory for our project and setting up the basic structure:
$ mkdir chess_game
$ cd chess_game
$ mkdir lib
$ touch lib/board.rb lib/piece.rb lib/game.rb lib/player.rb lib/pieces/*.rb main.rb
Defining the Board Class
The Board class will handle the creation of the chessboard and the placement of pieces.
# lib/board.rb
class Board
  attr_accessor :grid

  def initialize
    @grid = Array.new(8) { Array.new(8) }
    setup_board
  end

  def setup_board
    # Setup pieces on the board
    # We'll add more detailed setup code later
  end

  def display
    @grid.each do |row|
      row.each do |square|
        print square.nil? ? '-' : square.symbol
        print ' '
      end
      puts
    end
  end
end
Defining the Piece Class
Next, we’ll create a base Piece class and individual classes for each type of piece (Pawn, Rook, Knight, Bishop, Queen, King).
# lib/piece.rb
class Piece
  attr_reader :color, :symbol
  attr_accessor :position

  def initialize(color, position)
    @color = color
    @position = position
    @symbol = 'P'
  end

  def moves
    # To be overridden by each specific piece type
  end

  def valid_move?(destination)
    moves.include?(destination)
  end
end
Creating Specific Piece Classes
We’ll define specific classes for each piece, starting with the Pawn.
# lib/pieces/pawn.rb
class Pawn < Piece
  def initialize(color, position)
    super
    @symbol = color == :white ? '♙' : '♟'
  end

  def moves
    # Logic for pawn moves
  end
end
Similarly, we create classes for Rook, Knight, Bishop, Queen, and King, each with their own unique movement logic.
Defining the Game Class
The Game class will manage the flow of the game, including player turns and checking for checkmate or stalemate.
# lib/game.rb
class Game
  attr_accessor :board, :players, :current_turn

  def initialize
    @board = Board.new
    @players = { white: Player.new(:white), black: Player.new(:black) }
    @current_turn = :white
  end

  def play
    loop do
      board.display
      player = players[current_turn]
      move = player.get_move
      make_move(move)
      break if game_over?
      switch_turns
    end
  end

  def make_move(move)
    # Logic to update the board with the move
  end

  def switch_turns
    @current_turn = current_turn == :white ? :black : :white
  end

  def game_over?
    # Logic to determine if the game is over (checkmate or stalemate)
  end
end
Defining the Player Class
The Player class will handle player-specific actions, such as getting moves from the user.
# lib/player.rb
class Player
  attr_reader :color

  def initialize(color)
    @color = color
  end

  def get_move
    # Get move input from the player
  end
end
Implementing Movement Logic
Each piece type has its own specific movement rules. Let’s implement the movement logic for each piece, starting with the Pawn.
# lib/pieces/pawn.rb
class Pawn < Piece
  def initialize(color, position)
    super
    @symbol = color == :white ? '♙' : '♟'
  end

  def moves
    possible_moves = []
    direction = color == :white ? -1 : 1

    # Move forward
    one_step_forward = [position[0] + direction, position[1]]
    possible_moves << one_step_forward if board.valid_position?(one_step_forward) && board.empty?(one_step_forward)

    # Capture diagonally
    capture_moves = [[position[0] + direction, position[1] - 1], [position[0] + direction, position[1] + 1]]
    capture_moves.each do |move|
      possible_moves << move if board.valid_position?(move) && board.enemy_piece?(move, color)
    end

    possible_moves
  end
end
Implement the movement logic for the other pieces (Rook, Knight, Bishop, Queen, King) in their respective files in the lib/pieces/ directory.
Adding Game Logic
We need to handle the overall game logic, including turns, check conditions, and move validations.
Handling Turns and Moves
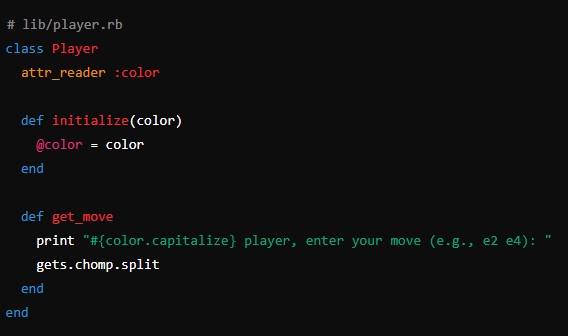
We’ll update the Player class to get moves from the user and validate them.
# lib/player.rb
class Player
  attr_reader :color

  def initialize(color)
    @color = color
  end

  def get_move
    print "#{color.capitalize} player, enter your move (e.g., e2 e4): "
    gets.chomp.split
  end
end
Validating Moves
The Game class needs to validate moves and update the board accordingly.
# lib/game.rb
class Game
  # Existing code...

  def make_move(move)
    start_pos, end_pos = parse_move(move)
    piece = board[start_pos]

    if piece && piece.color == current_turn && piece.valid_move?(end_pos)
      board.move_piece(start_pos, end_pos)
    else
      puts "Invalid move. Try again."
    end
  end

  def parse_move(move)
    # Convert input like 'e2' to board coordinates
  end
end
Displaying the Board
Improve the Board class’s display method to show a more visually appealing chessboard.
# lib/board.rb
class Board
  # Existing code...

  def display
    puts "  a b c d e f g h"
    @grid.each_with_index do |row, i|
      print "#{8 - i} "
      row.each do |square|
        print square.nil? ? '- ' : "#{square.symbol} "
      end
      puts "#{8 - i}"
    end
    puts "  a b c d e f g h"
  end
end
Running the Game
To run the game, we’ll use the main.rb file to initialize the game and start playing.
# main.rb
require_relative 'lib/board'
require_relative 'lib/piece'
require_relative 'lib/game'
require_relative 'lib/player'
Dir[File.join(__dir__, 'lib/pieces', '*.rb')].each { |file| require file }

game = Game.new
game.play
Enhancements and Additional Features
Our basic chess game is now functional, but there are many enhancements and additional features we can add:
- Check and Checkmate Detection: Implement logic to detect when a king is in check or checkmate.
- Castling and En Passant: Add rules for special moves like castling and en passant.
- Promotion: Implement pawn promotion to allow a pawn to be promoted to a queen, rook, bishop, or knight when it reaches the opposite side of the board.
- AI Opponent: Create an AI opponent to play against the user using basic algorithms like minimax or more advanced techniques.
- Graphical User Interface (GUI): Develop a GUI using libraries like Ruby GTK or Ruby Shoes to make the game more interactive and visually appealing.
Summary
Building a chess game in Ruby is an excellent way to practice object-oriented programming and game development. By breaking down the game into manageable components and implementing each part step-by-step, we’ve created a functional chess game. This project provides a solid foundation for further enhancements and more complex features, offering a valuable learning experience for developers at all levels. Whether you are a beginner looking to improve your programming skills or an experienced developer seeking a challenging project, building a chess game in Ruby is a rewarding endeavor.