Introduction to DOM Manipulation
The Document Object Model (DOM) is a critical concept in web development that allows developers to interact with and manipulate the structure and content of a web page dynamically. Understanding how to perform basic DOM manipulation is essential for creating interactive and responsive web applications. This article provides a thorough exploration of DOM manipulation, covering the basics, essential methods, and practical examples to help you get started.
Matrix Multiplication Program in Java: A Comprehensive Guide
What is the DOM?
The DOM is a programming interface for web documents. It represents the page so that programs can change the document structure, style, and content. The DOM represents the document as nodes and objects; that way, programming languages can interact with the page.
Key Concepts of the DOM
- Nodes and Elements: The building blocks of the DOM. Nodes can be elements, text, comments, etc.
- Tree Structure: The DOM organizes the document in a tree structure with a root node (usually
<html>), branches (elements like<body>,<div>, etc.), and leaves (text nodes, comments, etc.).
Selecting Elements in the DOM
Before manipulating the DOM, you need to select the elements you want to work with. JavaScript provides several methods for selecting elements:
getElementById
This method returns the element that has the ID attribute with the specified value.
let element = document.getElementById('myElement');getElementsByClassName
This method returns a collection of all elements in the document with the specified class name.
let elements = document.getElementsByClassName('myClass');getElementsByTagName
This method returns a collection of all elements in the document with the specified tag name.
let elements = document.getElementsByTagName('div');querySelector
This method returns the first element that matches a specified CSS selector.
let element = document.querySelector('.myClass');querySelectorAll
This method returns a static NodeList of all elements that match a specified CSS selector.
let elements = document.querySelectorAll('.myClass');Manipulating DOM Elements
Once you have selected the elements, you can manipulate them in various ways, such as changing their content, attributes, styles, and more.
Changing Content
innerHTML
This property sets or returns the HTML content of an element.
let element = document.getElementById('myElement');
element.innerHTML = 'New content';
textContent
This property sets or returns the text content of an element.
let element = document.getElementById('myElement');
element.textContent = 'New text content';
Changing Attributes
setAttribute
This method sets the value of an attribute on the specified element.
let element = document.getElementById('myElement');
element.setAttribute('class', 'newClass');
getAttribute
This method returns the value of an attribute on the specified element.
let element = document.getElementById('myElement');
let className = element.getAttribute('class');
removeAttribute
This method removes an attribute from the specified element.
let element = document.getElementById('myElement');
element.removeAttribute('class');
Changing Styles
You can change the CSS styles of an element directly using the style property.
let element = document.getElementById('myElement');
element.style.color = 'red';
element.style.backgroundColor = 'yellow';
element.style.fontSize = '20px';
Creating and Inserting Elements
Creating new elements and inserting them into the DOM is a common task in web development. JavaScript provides methods for these actions.
Creating Elements
createElement
This method creates an element with the specified tag name.
let newElement = document.createElement('div');
newElement.textContent = 'Hello, World!';
Inserting Elements
appendChild
This method appends a node as the last child of a parent node.
let parentElement = document.getElementById('parent');
let newElement = document.createElement('div');
newElement.textContent = 'Hello, World!';
parentElement.appendChild(newElement);
insertBefore
This method inserts a node before a reference node as a child of a specified parent node.
let parentElement = document.getElementById('parent');
let newElement = document.createElement('div');
newElement.textContent = 'Hello, World!';
let referenceElement = document.getElementById('reference');
parentElement.insertBefore(newElement, referenceElement);
innerHTML
This property can also be used to insert new HTML content, but it can replace the entire content of the element.
let parentElement = document.getElementById('parent');
parentElement.innerHTML += '<div>Hello, World!</div>';
Removing Elements
Removing elements from the DOM is just as important as adding them. Here are some methods for removing elements.
removeChild
This method removes a specified child node of the parent element.
let parentElement = document.getElementById('parent');
let childElement = document.getElementById('child');
parentElement.removeChild(childElement);
remove
This method removes the element from the DOM.
let element = document.getElementById('myElement');
element.remove();
Event Handling
Event handling is a critical part of DOM manipulation. It allows you to respond to user interactions, such as clicks, mouse movements, and keyboard inputs.
Adding Event Listeners
addEventListener
This method attaches an event handler to an element without overwriting existing event handlers.
let button = document.getElementById('myButton');
button.addEventListener('click', function() {
    alert('Button clicked!');
});
onclick
This property can also be used to add an event handler, but it overwrites any existing event handlers.
let button = document.getElementById('myButton');
button.onclick = function() {
    alert('Button clicked!');
};
Removing Event Listeners
removeEventListener
This method removes an event handler that was added with addEventListener.
let button = document.getElementById('myButton');
function handleClick() {
    alert('Button clicked!');
}
button.addEventListener('click', handleClick);
// To remove the event listener
button.removeEventListener('click', handleClick);
Practical Examples of DOM Manipulation
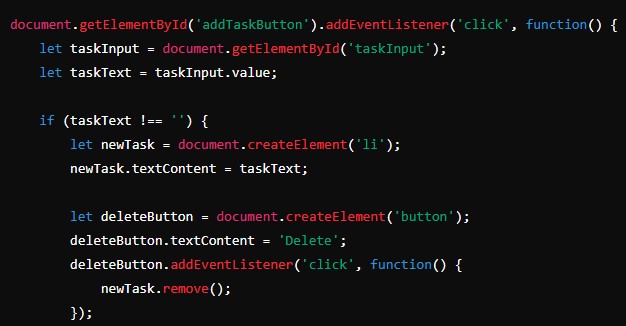
Example 1: Creating a To-Do List
Let’s create a simple to-do list application using DOM manipulation.
HTML
<!DOCTYPE html>
<html lang="en">
<head>
    <meta charset="UTF-8">
    <meta name="viewport" content="width=device-width, initial-scale=1.0">
    <title>To-Do List</title>
</head>
<body>
    <h1>To-Do List</h1>
    <input type="text" id="taskInput" placeholder="Enter a new task">
    <button id="addTaskButton">Add Task</button>
    <ul id="taskList"></ul>

    <script src="script.js"></script>
</body>
</html>
JavaScript
document.getElementById('addTaskButton').addEventListener('click', function() {
    let taskInput = document.getElementById('taskInput');
    let taskText = taskInput.value;

    if (taskText !== '') {
        let newTask = document.createElement('li');
        newTask.textContent = taskText;

        let deleteButton = document.createElement('button');
        deleteButton.textContent = 'Delete';
        deleteButton.addEventListener('click', function() {
            newTask.remove();
        });

        newTask.appendChild(deleteButton);
        document.getElementById('taskList').appendChild(newTask);

        taskInput.value = '';
    }
});
Example 2: Image Gallery
Let’s create a simple image gallery where users can click on thumbnails to view a larger version of the image.
HTML
<!DOCTYPE html>
<html lang="en">
<head>
    <meta charset="UTF-8">
    <meta name="viewport" content="width=device-width, initial-scale=1.0">
    <title>Image Gallery</title>
    <style>
        #largeImage {
            display: block;
            margin: 20px auto;
            max-width: 100%;
        }
        .thumbnail {
            cursor: pointer;
            margin: 10px;
            width: 100px;
        }
    </style>
</head>
<body>
    <h1>Image Gallery</h1>
    <img id="largeImage" src="image1.jpg" alt="Large Image">
    <div id="thumbnails">
        <img class="thumbnail" src="image1.jpg" alt="Image 1">
        <img class="thumbnail" src="image2.jpg" alt="Image 2">
        <img class="thumbnail" src="image3.jpg" alt="Image 3">
    </div>

    <script src="script.js"></script>
</body>
</html>
JavaScript
document.querySelectorAll('.thumbnail').forEach(function(thumbnail) {
    thumbnail.addEventListener('click', function() {
        let largeImage = document.getElementById('largeImage');
        largeImage.src = thumbnail.src;


    });
});
Conclusion
Basic DOM manipulation is a fundamental skill for web developers. It enables you to create dynamic, interactive web pages that respond to user actions. By mastering the methods for selecting, manipulating, creating, and removing elements, as well as handling events, you can build a wide range of web applications.
This article covered the essential concepts and techniques of DOM manipulation, including practical examples to help you apply what you’ve learned. As you become more comfortable with these basics, you’ll be well-prepared to tackle more advanced topics and create even more sophisticated web applications.