Building a Dynamic Android App with Java: A Step-by-Step Guide
Introduction:
Mobile app development has become an integral part of the digital landscape, and Android remains one of the most popular platforms. If you’re a Java developer looking to venture into Android app development, you’re in the right place. In this guide, we’ll walk through the process of developing a Java-based Android app, from setting up your development environment to building a fully functional application.
- Developing a Computer Vision Application with OpenCV in C++
- Unleashing the Power of Machine Learning: A Guide to Developing a Model with TensorFlow
Prerequisites:
Before we dive into the code, make sure you have the following tools installed on your machine:
- Java Development Kit (JDK): Ensure you have the latest version of JDK installed. You can download it from the official Oracle website or use OpenJDK.
- Android Studio: This is the official integrated development environment (IDE) for Android app development. Download and install it from the official Android Studio website.
- Android SDK: Android Studio comes with the Android SDK, which includes essential libraries and tools needed for Android development.
Setting up the Project:
- Open Android Studio and select “Start a new Android Studio project.”
- Choose an appropriate template based on your app requirements.
- Enter the name of your app, select the save location, and click “Finish.”
Understanding the Project Structure:
Android Studio organizes projects using the Model-View-Controller (MVC) architecture. Key directories include:
app/src/main/java: Contains your Java code.app/src/main/res: Contains resources such as layouts, images, and strings.app/src/main/AndroidManifest.xml: Defines the app’s configuration and components.
Writing Java Code:
- Open the
MainActivity.javafile in thejavadirectory. - In the
onCreatemethod, you can start adding your Java code to handle UI elements, logic, and more.
import android.os.Bundle;
import androidx.appcompat.app.AppCompatActivity;

public class MainActivity extends AppCompatActivity {

    @Override
    protected void onCreate(Bundle savedInstanceState) {
        super.onCreate(savedInstanceState);
        setContentView(R.layout.activity_main);

        // Add your Java code here
    }
}
Creating Layouts:
- Open the
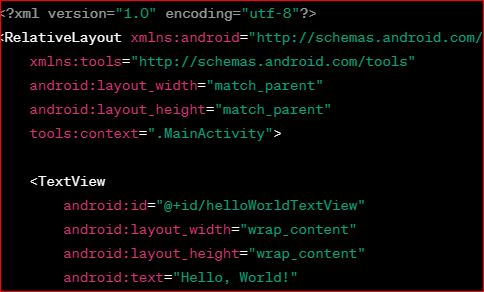
res/layout/activity_main.xmlfile. - Design your app’s layout using XML. Drag and drop UI elements from the Palette or manually edit the XML code.
Example XML layout:
<?xml version="1.0" encoding="utf-8"?>
<RelativeLayout xmlns:android="http://schemas.android.com/apk/res/android"
    xmlns:tools="http://schemas.android.com/tools"
    android:layout_width="match_parent"
    android:layout_height="match_parent"
    tools:context=".MainActivity">

    <TextView
        android:id="@+id/helloWorldTextView"
        android:layout_width="wrap_content"
        android:layout_height="wrap_content"
        android:text="Hello, World!"
        android:layout_centerInParent="true"
        android:textSize="20sp"/>

</RelativeLayout>
Adding Functionality:
Let’s enhance our app by adding a button click listener to change the text dynamically.
// Inside onCreate method

Button clickButton = findViewById(R.id.button);
final TextView helloWorldTextView = findViewById(R.id.helloWorldTextView);

clickButton.setOnClickListener(new View.OnClickListener() {
    public void onClick(View v) {
        helloWorldTextView.setText("Button Clicked!");
    }
});
Testing the App:
- Connect an Android device or use an emulator.
- Click the “Run” button in Android Studio.
- Once the app is installed, test its functionality on the device or emulator.
Conclusion:
Congratulations! You’ve successfully developed a simple Android app using Java and Android Studio. This guide provides a basic foundation, and from here, you can explore advanced topics such as handling data, integrating APIs, and creating more complex UIs. The Android developer documentation is an excellent resource for further learning and exploration. Happy coding!