In today’s digital era, e-commerce has revolutionized the way businesses operate and how consumers shop. With the rise of online shopping, having an e-commerce website is no longer optional; it’s essential. Building a basic e-commerce website using JavaScript allows for a dynamic, responsive, and interactive user experience. This article will guide you through the steps to create a simple yet functional e-commerce website using JavaScript.
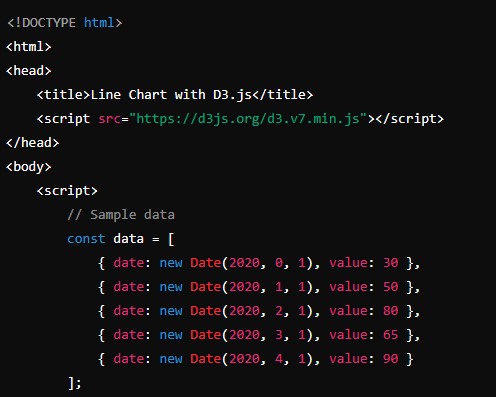
Data Visualization with D3.js: A Comprehensive Guide
Introduction
JavaScript is a versatile programming language commonly used in web development to create interactive effects within web browsers. When combined with HTML and CSS, JavaScript can be used to build powerful e-commerce websites that provide a seamless shopping experience for users. This article will cover the planning, design, and development stages of building an e-commerce website using JavaScript.
Planning Your E-commerce Website
Defining Your Goals
Before diving into the technical details, it’s crucial to define the goals of your e-commerce website. Consider the following questions:
- What products or services will you offer?
- Who is your target audience?
- What unique value propositions will your store provide?
- What are your sales and marketing strategies?
By clearly defining your goals, you can make informed decisions throughout the development process and ensure that your website meets the needs of your business and customers.
Choosing the Right Tools
To build an e-commerce website with JavaScript, you will need to select the appropriate tools and technologies. Some key tools include:
- HTML/CSS: For structuring and styling your website.
- JavaScript: For adding interactivity and functionality.
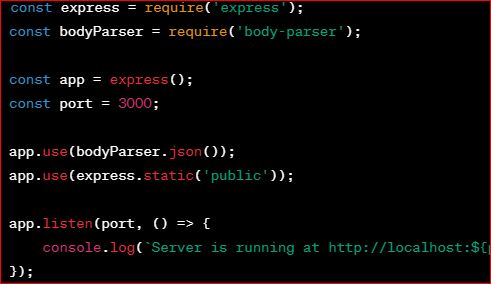
- Node.js: For server-side scripting and handling back-end operations.
- Express.js: A web application framework for Node.js, useful for building APIs and handling requests.
- MongoDB: A NoSQL database for storing product and user data.
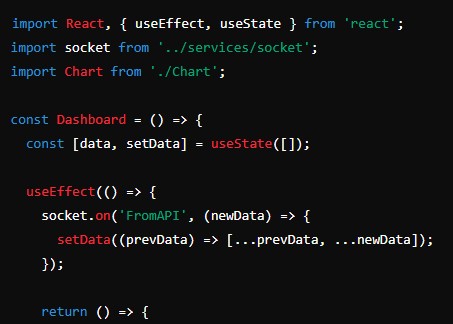
- React.js or Vue.js: JavaScript libraries/frameworks for building the front-end user interface.
Choosing the right stack depends on your specific requirements and expertise. For this article, we will use plain JavaScript for simplicity, focusing on the core functionalities of an e-commerce website.
Planning the Website Structure
A well-organized website structure is essential for a smooth user experience. Key components include:
- Homepage: Showcases featured products and promotions.
- Product Pages: Provide detailed information about each product.
- Category Pages: Organize products into categories for easier navigation.
- Shopping Cart: Allows users to review their selected items before checkout.
- Checkout Process: Facilitates the purchase process, including payment and shipping details.
- User Account: Allows customers to manage their orders and personal information.
By planning these components, you can ensure that your website is user-friendly and functional.
Designing Your E-commerce Website
User Experience (UX) Design
A successful e-commerce website must prioritize user experience (UX) to convert visitors into customers. Focus on:
- Navigation: Ensure easy navigation with a clear menu structure and search functionality.
- Responsiveness: Design your site to work seamlessly on various devices, including desktops, tablets, and smartphones.
- Loading Speed: Optimize images and code to reduce load times and improve performance.
- Call-to-Actions (CTAs): Use prominent CTAs to guide users towards making a purchase, such as “Add to Cart” and “Buy Now” buttons.
Visual Design
The visual appeal of your website plays a significant role in attracting and retaining customers. Consider the following:
- Branding: Use consistent branding elements, such as colors, fonts, and logos, to build brand recognition.
- Product Images: High-quality images are crucial for showcasing your products effectively.
- Layout: A clean and organized layout helps users find what they’re looking for quickly.
Creating Wireframes
Wireframes are blueprints for your website, outlining the structure and layout of each page. They help visualize the user flow and ensure all necessary elements are included. Tools like Sketch, Adobe XD, or even simple pen and paper can be used to create wireframes.
Developing Your E-commerce Website
Setting Up the Project
First, set up your project directory and create the necessary files and folders. Your project structure might look like this:
ecommerce-website/
│
├── index.html
├── styles.css
├── script.js
├── products.json
├── cart.js
├── checkout.js
│
└── assets/
    ├── images/
    └── icons/
Creating the HTML Structure
Create the basic HTML structure for your website, including sections for the homepage, products, cart, and checkout.
index.html
<!DOCTYPE html>
<html lang="en">
<head>
<meta charset="UTF-8">
<meta name="viewport" content="width=device-width, initial-scale=1.0">
<title>Basic E-commerce Website</title>
<link rel="stylesheet" href="styles.css">
</head>
<body>
<header>
<div class="container">
<h1>My E-commerce Store</h1>
<nav>
<ul>
<li><a href="#home">Home</a></li>
<li><a href="#products">Products</a></li>
<li><a href="#cart">Cart</a></li>
</ul>
</nav>
</div>
</header>
<main>
<section id="home" class="container">
<h2>Welcome to Our Store</h2>
<p>Find the best products at the most affordable prices!</p>
</section>
<section id="products" class="container">
<h2>Products</h2>
<div class="product-list">
<!-- Product items will be injected here by JavaScript -->
</div>
</section>
<section id="cart" class="container">
<h2>Shopping Cart</h2>
<div class="cart-items">
<!-- Cart items will be injected here by JavaScript -->
</div>
<div class="cart-total">
<h3>Total: $<span id="cart-total">0.00</span></h3>
<button id="checkout-btn">Checkout</button>
</div>
</section>
<section id="checkout" class="container">
<h2>Checkout</h2>
<form id="checkout-form">
<div class="form-group">
<label for="name">Name</label>
<input type="text" id="name" name="name" required>
</div>
<div class="form-group">
<label for="address">Address</label>
<input type="text" id="address" name="address" required>
</div>
<div class="form-group">
<label for="payment">Payment Method</label>
<select id="payment" name="payment" required>
<option value="credit-card">Credit Card</option>
<option value="paypal">PayPal</option>
</select>
</div>
<button type="submit">Place Order</button>
</form>
</section>
</main>
<footer>
<div class="container">
<p>© 2024 My E-commerce Store. All rights reserved.</p>
</div>
</footer>
<script src="script.js"></script>
</body>
</html>Styling with CSS
Create a CSS file to style your website. Use the following CSS code for basic styling.
styles.css
* {
box-sizing: border-box;
margin: 0;
padding: 0;
font-family: Arial, sans-serif;
}
body {
background-color: #f5f5f5;
color: #333;
}
header {
background-color: #333;
color: white;
padding: 1em 0;
}
header .container {
display: flex;
justify-content: space-between;
align-items: center;
max-width: 1200px;
margin: 0 auto;
padding: 0 20px;
}
header nav ul {
display: flex;
list-style-type: none;
}
header nav ul li {
margin: 0 15px;
}
header nav ul li a {
color: white;
text-decoration: none;
font-size: 1em;
}
.container {
max-width: 1200px;
margin: 20px auto;
padding: 0 20px;
}
h2 {
margin-bottom: 20px;
font-size: 2em;
}
.product-list {
display: flex;
flex-wrap: wrap;
gap: 20px;
}
.product-item {
background-color: white;
border: 1px solid #ddd;
padding: 15px;
flex: 1 1 calc(25% - 20px);
box-shadow: 0 2px 5px rgba(0, 0, 0, 0.1);
}
.product-item img {
max-width: 100%;
height: auto;
}
.product-item h3 {
margin: 15px 0;
font-size: 1.5em;
}
.product-item p {
margin-bottom: 15px;
}
.product-item button {
background-color: #333;
color: white;
border: none;
padding: 10px 15px;
cursor: pointer;
}
.cart-items {
margin-bottom: 20px;
}
.cart-item {
display: flex;
justify-content: space-between;
align-items: center;
padding: 10px 0;
border-bottom: 1px solid #ddd;
}
.cart-item button {
background-color: #e74c3c;
color: white;
border: none;
padding: 5px 10px;
cursor: pointer;
}
.cart-total {
text-align: right;
margin-top: 20px;
}
.cart-total h3 {
font-size: 1.5em;
}
#checkout-form {
max-width: 600px;
margin: 0 auto;
}
.form-group {
margin-bottom: 15px;
}
.form-group label {
display: block;
margin-bottom: 5px;
}
.form-group input,
.form-group select {
width: 100%;
padding: 10px;
border: 1px solid #ddd;
}
footer {
background-color: #333;
color: white;
text-align: center;
padding: 1em 0;
}
footer .container {
max-width: 1200px;
margin: 0 auto;
padding: 0 20px;
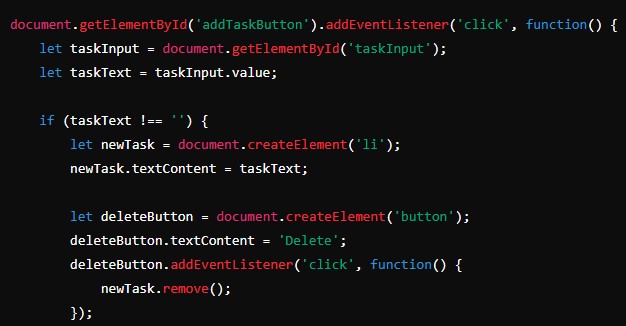
}Adding Interactivity with JavaScript
Use JavaScript to add interactivity to your website, such as displaying products, adding items to the cart, and handling the checkout process.
script.js
document.addEventListener('DOMContentLoaded', () => {
    const products = [
        { id: 1, name: 'Product 1', price: 29.99, image: 'https://via.placeholder.com/150' },
        { id: 2, name: 'Product 2', price: 49.99, image: 'https://via.placeholder.com/150' },
        { id: 3, name: 'Product 3', price: 19.99, image: 'https://via.placeholder.com/150' },
        { id: 4, name: 'Product 4', price: 99.99, image: 'https://via.placeholder.com/150' },
    ];

    const cart = [];

    const productListElement = document.querySelector('.product-list');
    const cartItemsElement = document.querySelector('.cart-items');
    const cartTotalElement = document.getElementById('cart-total');
    const checkoutForm = document.getElementById('checkout-form');

    // Function to display products
    function displayProducts() {
        products.forEach(product => {
            const productItem = document.createElement('div');
            productItem.classList.add('product-item');
            productItem.innerHTML = `
                <img src="${product.image}" alt="${product.name}">
                <h3>${product.name}</h3>
                <p>$${product.price.toFixed(2)}</p>
                <button data-id="${product.id}">Add to Cart</button>
            `;
            productListElement.appendChild(productItem);
        });
    }

    // Function to update the cart
    function updateCart() {
        cartItemsElement.innerHTML = '';
        cart.forEach(item => {
            const cartItem = document.createElement('div');
            cartItem.classList.add('cart-item');
            cartItem.innerHTML = `
                <span>${item.name} - $${item.price.toFixed(2)} x ${item.quantity}</span>
                <button data-id="${item.id}">Remove</button>
            `;
            cartItemsElement.appendChild(cartItem);
        });
        const total = cart.reduce((sum, item) => sum + item.price * item.quantity, 0);
        cartTotalElement.textContent = total.toFixed(2);
    }

    // Function to add product to cart
    function addToCart(productId) {
        const product = products.find(p => p.id === productId);
        const cartItem = cart.find(item => item.id === productId);

        if (cartItem) {
            cartItem.quantity++;
        } else {
            cart.push({ ...product, quantity: 1 });
        }
        updateCart();
    }

    // Function to remove product from cart
    function removeFromCart(productId) {
        const cartIndex = cart.findIndex(item => item.id === productId);
        if (cartIndex !== -1) {
            cart.splice(cartIndex, 1);
        }
        updateCart();
    }

    // Event listeners for adding/removing products from cart
    productListElement.addEventListener('click', (e) => {
        if (e.target.tagName === 'BUTTON') {
            const productId = parseInt(e.target.getAttribute('data-id'));
            addToCart(productId);
        }
    });

    cartItemsElement.addEventListener('click', (e) => {
        if (e.target.tagName === 'BUTTON') {
            const productId = parseInt(e.target.getAttribute('data-id'));
            removeFromCart(productId);
        }
    });

    // Event listener for checkout form submission
    checkoutForm.addEventListener('submit', (e) => {
        e.preventDefault();
        alert('Order placed successfully!');
        cart.length = 0;
        updateCart();
        checkoutForm.reset();
    });

    // Display products on page load
    displayProducts();
});
Adding Products Data (Optional)
For a real-world application, product data would typically be fetched from a database or an API. In this example, we use a static array of products to keep things simple. You can store this data in a separate JSON file (products.json) and fetch it using JavaScript if you prefer.
products.json (Optional)
[
    { "id": 1, "name": "Product 1", "price": 29.99, "image": "https://via.placeholder.com/150" },
    { "id": 2, "name": "Product 2", "price": 49.99, "image": "https://via.placeholder.com/150" },
    { "id": 3, "name": "Product 3", "price": 19.99, "image": "https://via.placeholder.com/150" },
    { "id": 4, "name": "Product 4", "price": 99.99, "image": "https://via.placeholder.com/150" }
]
Enhancing Functionality
To make your e-commerce website more robust, consider adding the following features:
- User Authentication: Allow users to create accounts, log in, and manage their profiles.
- Product Search and Filters: Enable users to search for products and filter by categories, price, etc.
- Order Management: Implement order tracking and history for users.
- Payment Integration: Integrate with payment gateways like Stripe or PayPal for processing payments securely.
- Responsive Design: Ensure your website is fully responsive and accessible on all devices.
Conclusion
Building a basic e-commerce website with JavaScript involves careful planning, thoughtful design, and diligent development. By following the steps outlined in this article, you can create a functional e-commerce platform that provides a great user experience. Remember, this is just a starting point. As your business grows, you can continue to enhance and expand your website’s features and capabilities.
With the right tools and a clear vision, you can build an e-commerce website that meets the needs of your business and delights your customers. Happy coding!